Diagnostic Tool Recovery (Using ScanBay)
These instructions are for recovering programming from
a diagnostic tool using the Device Recovery application
included with ScanBay on your Sales System Laptop.
These instructions apply to applicable Non-Windows®
based Snap-on diagnostic tools with a μSD card
and USB connection.
e.g. TRITON, APOLLO, SOLUS and VANTAGE Series / MODIS Edge / ETHOS Edge / P1000
As this instruction sheet is intended for multiple
markets, these instructions may apply to other
diagnostic tools not listed in the example above. All
images and illustrations used in this document are
intended as examples, and are for reference only.
Before You Begin
Before using the Device Recovery application read
these IMPORTANT notes.
|
●
|
Device Recovery only supports the current software upgrade and the two previous software upgrades. |
|
●
|
If the unit had previously installed a service release for the current software version it will need to be reinstalled using ShopStream Connect™ |
|
●
|
Using this Device Recovery application will remove
ALL the saved data files from the diagnostic tool.
Before using this application, copy all the files
needed (saved customer data files) to your Sales System Laptop,
separate storage media, or use ShopStream
Connect. |
|
●
|
To avoid damage, DO NOT remove or disconnect
the diagnostic tool from your Sales System Laptop during the
recovery process. It is highly recommended to
power the diagnostic tool with the AC power supply
during this procedure to avoid accidental power
loss. |
Device Recovery resolves errors and helps to improve performance.
Use it to fix:
|
●
|
An error at boot up, during vehicle communication* or after a software upgrade. (* Except a 'no-communication' error) |
|
●
|
Unusually slow performance and/or operating speed |
Instructions
|
1.
|
Power down the platform. |
|
2.
|
Connect the platform to its AC charger. |
|
3.
|
Press and HOLD the “Y” and “N” buttons. |
|
4.
|
Pressing and release the power button once while continuing to HOLD the “Y” and “N” buttons. |
|
5.
|
Release the “Y” and “N” buttons once the Service Menu appears. |
|
6.
|
Move the cursor to Utilities and press the “Y” button. |
|
7.
|
Move the cursor to Connect to PC and press the “Y” button. |
|
8.
|
Locate and start Device Recovery on the ScanBay  PC’s Windows desktop. PC’s Windows desktop. |
|
9.
|
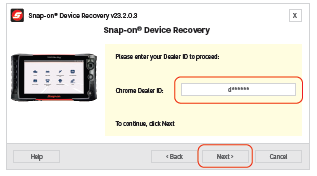
In the Device Recovery wizard enter the D# starting with a lower case ”d” and select Next. |
If it is connected to a PC, you must disconnect the USB to Mini-USB cable from the PC and wait 10 seconds before proceeding.
|
10.
|
Connect the platform to the ScanBay PC using a USB to Mini-USB cable and allow Device Recovery to detect the platform. |
|
11.
|
Once Device Recovery has detected the platform follow the prompts to finish programming. |
|
12.
|
When complete, ensure the platform is still connected to the AC adapter. |
|
13.
|
Disconnect the platform from the PC. |
|
14.
|
Press the platform Power button. |
|
15.
|
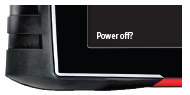
When ‘Power Off?’ is displayed in the lower left corner. Click the “Y” button. |
|
16.
|
Press the Power button to power up the tool. |
|
17.
|
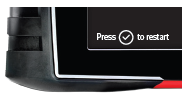
Allow the scan tool to complete reinstallation of software. When prompted press the ‘Y’ button to restart the tool. |